Bài viết được sự cho phép của tác giả Nguyễn Việt Hưng
I. Markdown
Markdown được nói trong bài này là cú pháp để phục vụ việc chuyển text thành HTML. Tức là khi viết bằng cú pháp markdown, đưa qua 1 chương trình xử lý, nó sẽ cho ra kết quả là HTML.
Một số cú pháp hay dùng:
Headers
# H1
## H2
### H3
#### H4
##### H5
###### H6
Kết quả: (lưu ý, xem source html của kết quả để biết chính xác, việc trình bày có thể bị ảnh hưởng bới template của blog)

H1
H2
H3
H4
H5
H6
Định dạng chữ:
Chữ nghiêng: *nghiêng* hoặc _nghiêng_. (*: asterik, _: underscore)

Chữ đậm: **đậm** hoặc __đậm__.

Nghiêng đậm: **_nghiêng đậm_** hoặc *__nghiêng đậm__*

Gạch ngang chữ: <s>gạch ngang</s>
Kết quả:
Chữ nghiêng: nghiêng hoặc nghiêng. (*: asterik, _: underscore)
Chữ đậm: đậm hoặc đậm.
Nghiêng đậm: nghiêng đậm hoặc nghiêng đậm
Gạch ngang chữ: gạch ngang
Link
[I'm an inline-style link](http://fml.vn)

[I'm an inline-style link with title](http://fml.vn "FML Academy")

[I'm a reference-style link][Arbitrary case-insensitive reference text]

[I'm a relative reference to a repository file](../blob/master/LICENSE)

[You can use numbers for reference-style link definitions][1]

Or leave it empty and use the [link text itself].

[arbitrary case-insensitive reference text]: http://fml.vn
[1]: http://fml.vn
[link text itself]:http://fml.vn
Kết quả:
I’m an inline-style link
I’m an inline-style link with title
I’m a reference-style link
I’m a relative reference to a repository file
You can use numbers for reference-style link definitions
Or leave it empty and use the link text itself.
Image
Here's our logo (hover to see the title text):
Inline-style:

Reference-style:
![alt text][logo]
[logo]: https://github.com/adam-p/markdown-here/raw/master/src/common/images/icon48.png "Logo Title Text 2"
Kết quả
Here’s our logo (hover to see the title text):
Inline-style: 
Reference-style:
Code
`inline code` không xuống dòng
hoặc
“`python
print(‘This is python code’)
“`
Kết quả
inline code không xuống dòng
hoặc
print('This is python code')
Còn nhiều cú pháp nữa, xem chi tiết tại đây
II. Pelican
Pelican là một công cụ để tự động tạo file html, được viết bằng python. Hỗ trợ cú pháp reStructure (file đuôi .rst) và markdown (file đuôi .md)
1. Tạo virtualenv, kích hoạt và cài pelican, markdown vào virtualenv:
╭─htl@htl-homeserver  ~/pelican
╰─$ virtualenv -p $(which python3) venv
Running virtualenv with interpreter /usr/local/bin/python3
Using base prefix '/usr/local'
New python executable in venv/bin/python3
Also creating executable in venv/bin/python
Installing setuptools, pip, wheel...done.
╭─htl@htl-homeserver  ~/pelican
╰─$ source ./venv/bin/activate
(venv)╭─htl@htl-homeserver  ~/pelican
╰─$ pip install pelican markdown
Collecting pelican
  Using cached pelican-3.6.3-py2.py3-none-any.whl
Collecting markdown
Collecting docutils (from pelican)
  Using cached docutils-0.12-py3-none-any.whl
Collecting six>=1.4 (from pelican)
  Using cached six-1.10.0-py2.py3-none-any.whl
Collecting unidecode (from pelican)
Collecting jinja2>=2.7 (from pelican)
  Using cached Jinja2-2.8-py2.py3-none-any.whl
Collecting feedgenerator>=1.6 (from pelican)
Collecting pytz>=0a (from pelican)
  Using cached pytz-2016.4-py2.py3-none-any.whl
Collecting pygments (from pelican)
  Using cached Pygments-2.1.3-py2.py3-none-any.whl
Collecting blinker (from pelican)
Collecting python-dateutil (from pelican)
  Using cached python_dateutil-2.5.3-py2.py3-none-any.whl
Collecting MarkupSafe (from jinja2>=2.7->pelican)
Installing collected packages: docutils, six, unidecode, MarkupSafe, jinja2, pytz, feedgenerator, pygments, blinker, python-dateutil, pelican, markdown
Successfully installed MarkupSafe-0.23 blinker-1.4 docutils-0.12 feedgenerator-1.8 jinja2-2.8 markdown-2.6.6 pelican-3.6.3 pygments-2.1.3 python-dateutil-2.5.3 pytz-2016.4 six-1.10.0 unidecode-0.4.19
2. Tạo thư mục chứa blog và chạy pelican-quickstart để thiết lập các thông số ban đầu:
(venv)╭─htl@htl-homeserver  ~/pelican
╰─$ mkdir blog
mkdir: created directory 'blog'
(venv)╭─htl@htl-homeserver  ~/pelican
╰─$ cd blog
(venv)╭─htl@htl-homeserver  ~/pelican/blog
╰─$ pelican-quickstart
Welcome to pelican-quickstart v3.6.3.

This script will help you create a new Pelican-based website.

Please answer the following questions so this script can generate the files
needed by Pelican.


> Where do you want to create your new web site? [.]
> What will be the title of this web site? Test blog
> Who will be the author of this web site? htl
> What will be the default language of this web site? [en] vn
> Do you want to specify a URL prefix? e.g., http://example.com   (Y/n) n
> Do you want to enable article pagination? (Y/n) y
> How many articles per page do you want? [10]
> What is your time zone? [Europe/Paris] Asia/Ho_Chi_Minh
> Do you want to generate a Fabfile/Makefile to automate generation and publishing? (Y/n) y
> Do you want an auto-reload & simpleHTTP script to assist with theme and site development? (Y/n) y
> Do you want to upload your website using FTP? (y/N) n
> Do you want to upload your website using SSH? (y/N) n
> Do you want to upload your website using Dropbox? (y/N) n
> Do you want to upload your website using S3? (y/N) n
> Do you want to upload your website using Rackspace Cloud Files? (y/N) n
> Do you want to upload your website using GitHub Pages? (y/N) y
> Is this your personal page (username.github.io)? (y/N) n
Done. Your new project is available at /home/htl/pelican/blog
3. Viết blog trong thư mục content:
Đơn giản là chỉ cần tạo 1 file .md tại thư mục /blog/content, nội dung file được định dạng theo cú pháp markdown.
Các thông tin (metadata) cần thiết cho 1 bài viết được ghi ngay trên đầu file. Metadata tối thiểu bắt buộc phải có là Title, ngoài ra với cấu hình mặc định thì nên thêm Date:
Title: Tiêu đề bài viết
Date: 2016-06-28

Nội dung viết ở đây, định dạng **markdown**
Nếu metadata Date không được cung cấp trong nội dung bài viết thì pelican sẽ lấy thời gian tạo ra file, với điều kiện trong file pelicanconf.py phải có dòng (mà mặc định là chưa có):
DEFAULT_DATE = 'fs'
4. Tạo file html:
Điều kiện là khi khởi tạo bằng lệnh pelican-quickstart phải bật công cụ tự động tạo html ở câu hỏi này:
> Do you want to generate a Fabfile/Makefile to automate generation and publishing? (Y/n) y
Khi đó sẽ có file Makefile tại thư mục gốc của blog. Tạo blog bằng cách chạy lệnh make html:
(venv)╭─htl@htl-homeserver  ~/pelican/blog
╰─$ make html
pelican /home/htl/pelican/blog/content -o /home/htl/pelican/blog/output -s /home/htl/pelican/blog/pelicanconf.py
Done: Processed 1 article, 0 drafts, 0 pages and 0 hidden pages in 0.22 seconds.
Vậy là đã tạo được 1 file html trong thư mục output (ngang hàng với content).
Thử xem blog mình vừa viết trông như thế nào, dùng lệnh make serve:
(venv)╭─htl@htl-homeserver  ~/pelican/blog
╰─$ make serve
cd /home/htl/pelican/blog/output && python -m pelican.server
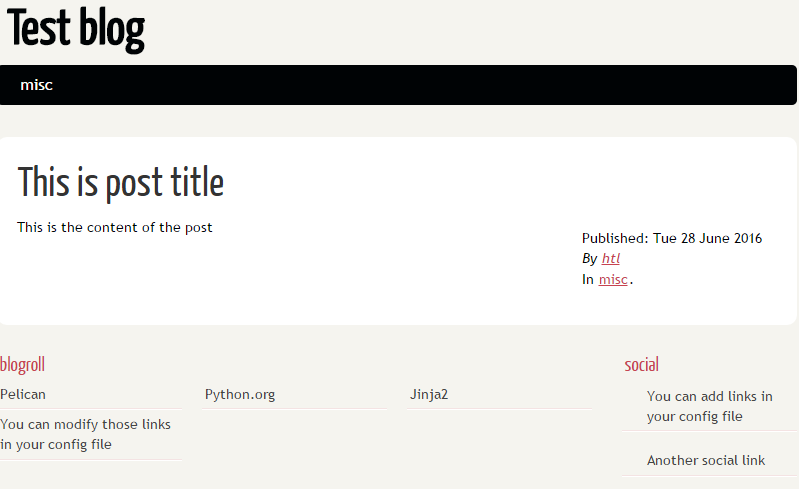
Vào http://localhost:8000 để xem thử:
III. Upload lên github pages:
1. Tạo 1 github repo có tên là username.github.io với username là tên tài khoản github của bạn.
2. Clone repo về local:
(venv)╭─htl@htl-homeserver  ~/pelican
╰─$ git clone [email protected]:fmltestblog/fmltestblog.github.io.git
Cloning into 'fmltestblog.github.io'...
warning: You appear to have cloned an empty repository.
3. Copy tất cả folder output vào thư mục của github repo:
(venv)╭─htl@htl-homeserver  ~/pelican
╰─$ cd fmltestblog.github.io
(venv)╭─htl@htl-homeserver  ~/pelican/fmltestblog.github.io  ‹master›
╰─$ cp -R ../blog/output/* .
4. git add, commit và push:
(venv)╭─htl@htl-homeserver  ~/pelican/fmltestblog.github.io  ‹master*›
╰─$ git add .
(venv)╭─htl@htl-homeserver  ~/pelican/fmltestblog.github.io  ‹master*›
╰─$ git commit -m 'first blog commit'
[master (root-commit) 5d4216d] first blog commit
 33 files changed, 1250 insertions(+)
 create mode 100644 archives.html
 create mode 100644 author/htl.html
 create mode 100644 authors.html
 create mode 100644 categories.html
 create mode 100644 category/misc.html
 create mode 100644 index.html
 create mode 100644 tags.html
 create mode 100644 theme/css/main.css
 create mode 100644 theme/css/pygment.css
 create mode 100644 theme/css/reset.css
 create mode 100644 theme/css/typogrify.css
 create mode 100644 theme/css/wide.css
 create mode 100644 theme/images/icons/aboutme.png
 create mode 100644 theme/images/icons/bitbucket.png
 create mode 100644 theme/images/icons/delicious.png
 create mode 100644 theme/images/icons/facebook.png
 create mode 100644 theme/images/icons/github.png
 create mode 100644 theme/images/icons/gitorious.png
 create mode 100644 theme/images/icons/gittip.png
 create mode 100644 theme/images/icons/google-groups.png
 create mode 100644 theme/images/icons/google-plus.png
 create mode 100644 theme/images/icons/hackernews.png
 create mode 100644 theme/images/icons/lastfm.png
 create mode 100644 theme/images/icons/linkedin.png
 create mode 100644 theme/images/icons/reddit.png
 create mode 100644 theme/images/icons/rss.png
 create mode 100644 theme/images/icons/slideshare.png
 create mode 100644 theme/images/icons/speakerdeck.png
 create mode 100644 theme/images/icons/stackoverflow.png
 create mode 100644 theme/images/icons/twitter.png
 create mode 100644 theme/images/icons/vimeo.png
 create mode 100644 theme/images/icons/youtube.png
 create mode 100644 this-is-post-title.html
(venv)╭─htl@htl-homeserver  ~/pelican/fmltestblog.github.io  ‹master›
╰─$ git push origin master
Counting objects: 41, done.
Delta compression using up to 2 threads.
Compressing objects: 100% (38/38), done.
Writing objects: 100% (41/41), 24.48 KiB, done.
Total 41 (delta 8), reused 0 (delta 0)
To [email protected]:fmltestblog/fmltestblog.github.io.git
 * [new branch]      master -> master
5. Mở trình duyệt, truy cập https://username.github.io
Blog của bạn đã online. Khi thêm 1 bài viết mới, hãy chạy lại từ bước II.4 và push lên github.
Bài viết gốc được đăng tải tại pymi.vn
Có thể bạn quan tâm:
- GitHub là gì? Những lợi ích GitHub mang lại cho lập trình viên
- Markdown là gì? Cách sử dụng Markdown
- Tại sao nên sử dụng Markdown thay vì Word?
- 12 điều cực “cool” mà bạn có thể làm với Github
Xem thêm Việc làm Developer hấp dẫn trên TopDev